There are a lot of articles about PWA that tell in detail what it is and how to set it up. Yet you may not always understand them at first sight.
My goal is to provide basic information in simple language that will be enough for you to understand what PWA is. Then, to show you a real example to strengthen everything that you learned. Thus, take your laptop and follow me.
After reading it, you will understand the following:
- Advantages and disadvantages of PWA
- Basic concept
- How to configure this technology on your website
- How to update the cache
Advantages and disadvantages
As with any technology, PWA has its benefits and limitations. Before covering them, let's understand what PWA is.
PWA technology was announced by Google in 2015. It positions itself as an additional add-on that allows you to make the site look like a mobile app.
At the same time, the interior does not change, does not transform, the site remains the same, only the browser is transformed.
Also, you should know for which type of business the PWA is a better solution than making a mobile app. You could find more information about the differences between PWA and mobile applications here:
What can PWA do?
- Sending notifications, caching content, and setting a shortcut to the desktop.
- Sending notifications in the form of a pop-up window, where you can notify the user about something.
- Working offline, i.e,. without an Internet connection, thanks to content caching.
PWA advantages
- PWA is easy to install. You don't need to go to any app stores, download anything, or dance with a tambourine. Just open the site by clicking on the link, the window “install a shortcut to the desktop” POPs up, install it and you're done.
- It works on all more or less modern devices; you only need a browser.
- It allows the site to be more accessible because of the shortcut on the desktop. You unlocked your phone, clicked on the shortcut, and the site opened. That's cool.
- It takes up less memory, less than 1 MB.
- Setting up a PWA requires less development time than creating a mobile app. It is unnecessary to write two identical apps on Android and IOS. Therefore, it will be much cheaper for businesses.
- Higher security — all resources are transmitted only over the https.
- Stable operation. If there are problems with the Internet, the content will be retrieved from the cache, so the site will always be available.
PWA disadvantages
- There is a misconception about the fact that PWA helps to improve SEO performance. I don’t agree with that!
And the first problem with which you become involved is the SPA, where HTML markup is rendered on the rendering page of JavaScript. Until the scripts load (as long as they need), the layout will not appear, and will only be awith the "app" ID. Here is just at the moment when everything is becoming stupid, SEO analysis occurs, but the page, as you understand, is empty. And even if you add +100500 PWA to the site, it will not speed up the rendering of HTML code.
And to be less unsubstantiated, let's make sure with a real example. Let's take the site madops.io, which is a single-page application. If you look at its inside view-source:https://madops.io, you'll see everything I described above.
In other cases, when the server renders all the HTML markup at once, there are no problems, as, for example, here view-source:https://maddevs.io. - Disability. Features such as camera control, SMS sending, sensor access, and more will not be available for PWA, for security reasons.
- There are still some browsers that don't support PWA. For example, push notifications on IOS.
If you want to read more about what PWA is, please check this link on MDN. And in our article "PWA vs. Native App: Which One to Choose?" you can find a list of PWA's best examples.
Basic concept
Before going deeply into PWA set up, let's figure out its basic concepts and its components
Service Worker — This is essentially a script file that is responsible for all this magic. All browser requests go through it, which gives a lot of possibilities. For example, if there is no Internet connection, it returns content from the cache(if it is there, of course).
In it, we handle various events, write, delete files from the cache, and much more.
Scripts run in the background, in parallel with the application.
manifest.json — settings File. There, we specify which icons to use, which text to display in the shortcut, in which format to open the browser window, and so on. Let's talk about it in more detail below.
Application Shell — this is the name of the shell for PWA. More specifically, it is a browser that is slightly transformed to give more features to the developer.
HTTPS — One of the main requirements of PWA is to transmit data over the HTTPS protocol, which is more secure.
You can use localhost for development.
Push Notifications — technology for sending push notifications.
Setting up PWA
PWA is really simple to set up. So let's start right from writing the code!
No, wait.
Here is a link to the ready-made code https://github.com/denisoed/PWA-example. Here you can download the images that will be required further, well, for the one you will get acquainted with what happened.
Firstly, you need to create a folder in the project and name it PWA, for example. Then add it to this folder, index.html, which will contain the following code:
I've already prepared the layout, but it looks bad without styles, so we'll add them as well. Creating a CSS folder where we add the styles.css file and insert the code below:
Then connect this file to index.html, in the "head" tag:
Let's immediately connect the necessary images, which can be downloaded here. Click on the link, there will be a button Clone or download, green such, click it, then click Download ZIP. The archive will be downloaded, and there will be images in the images folder. Phew, I think I explained it quite clearly:
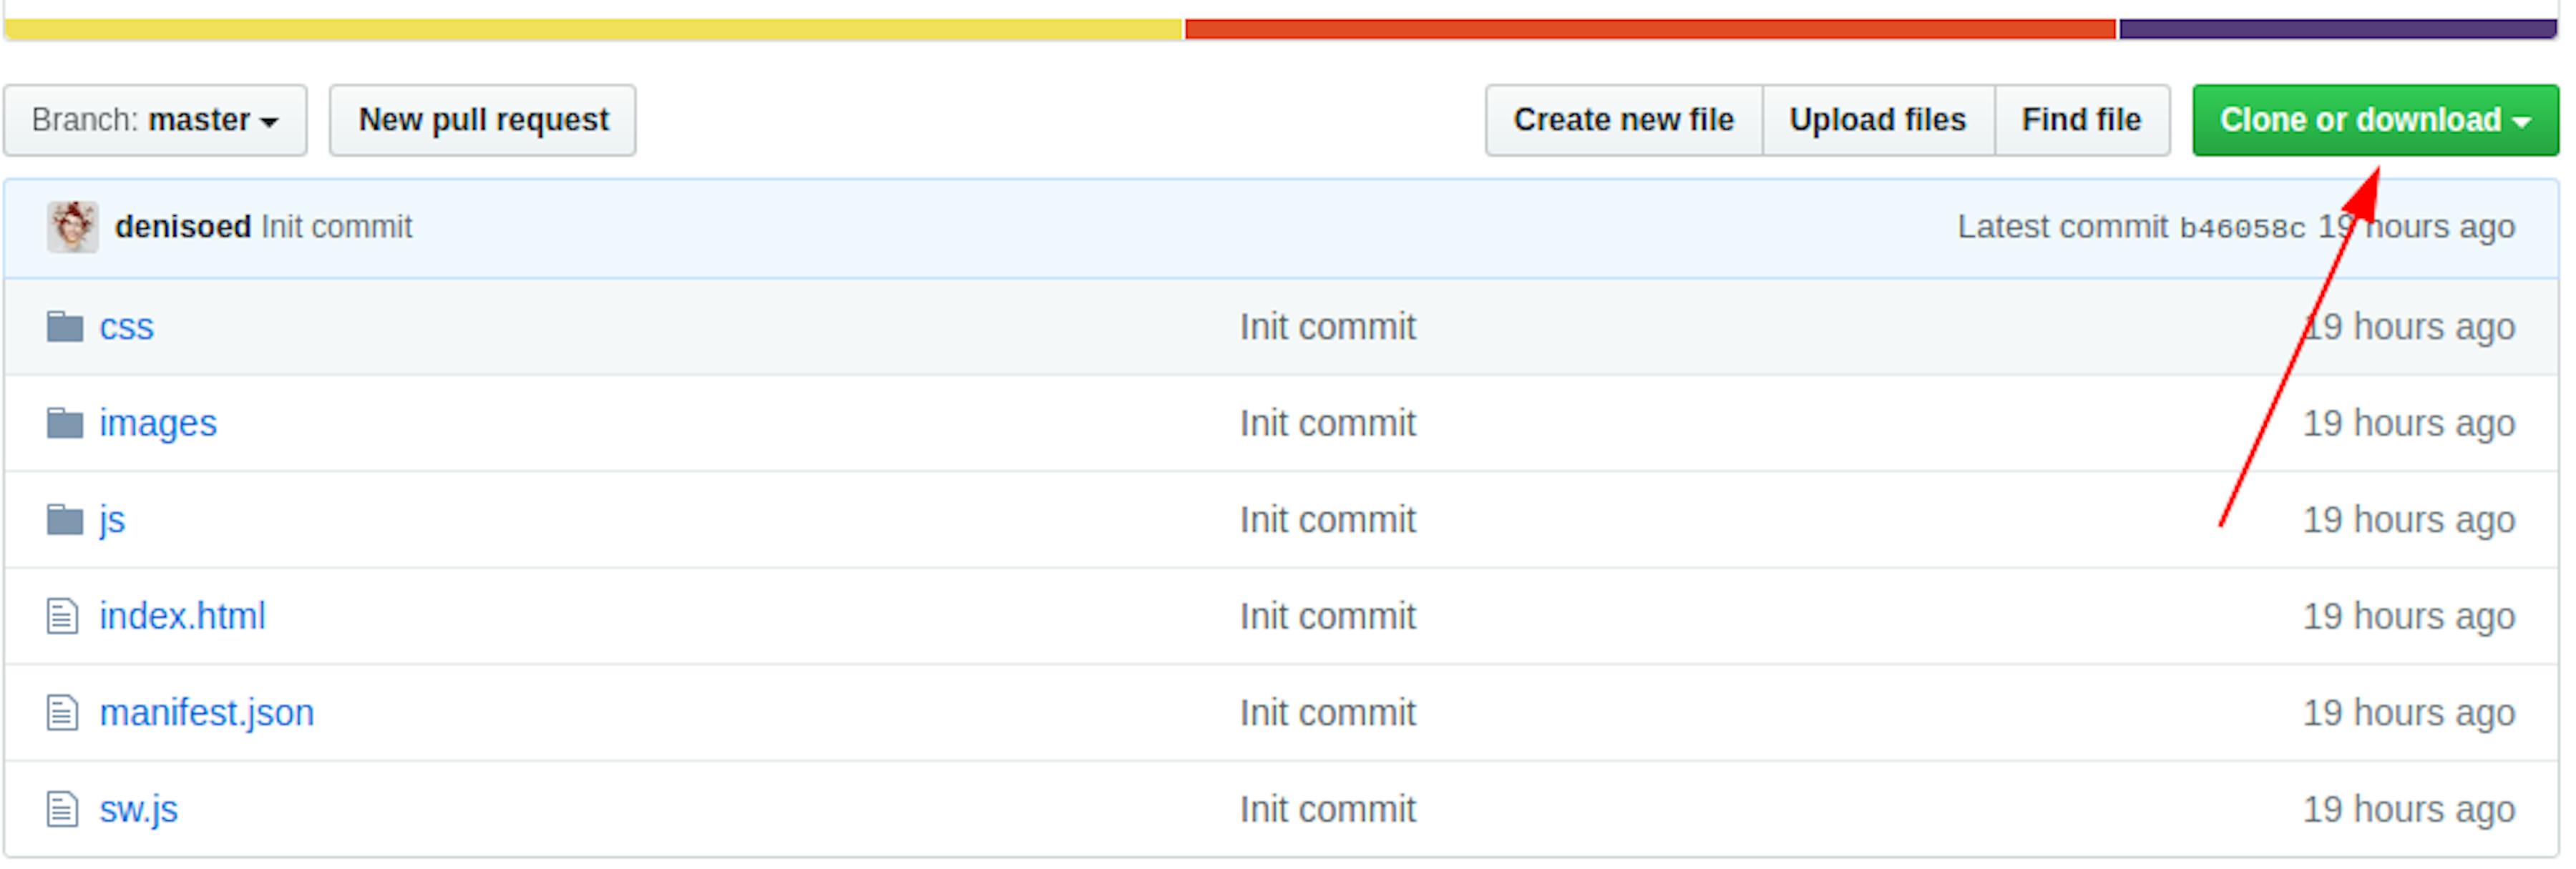
You open the project, create the images directory there, where you insert all the images. Then open index.html and insert meta information into the "head" tag. What it is and why you can read here.
As a result, in the file index.html, there should be a structure like this:
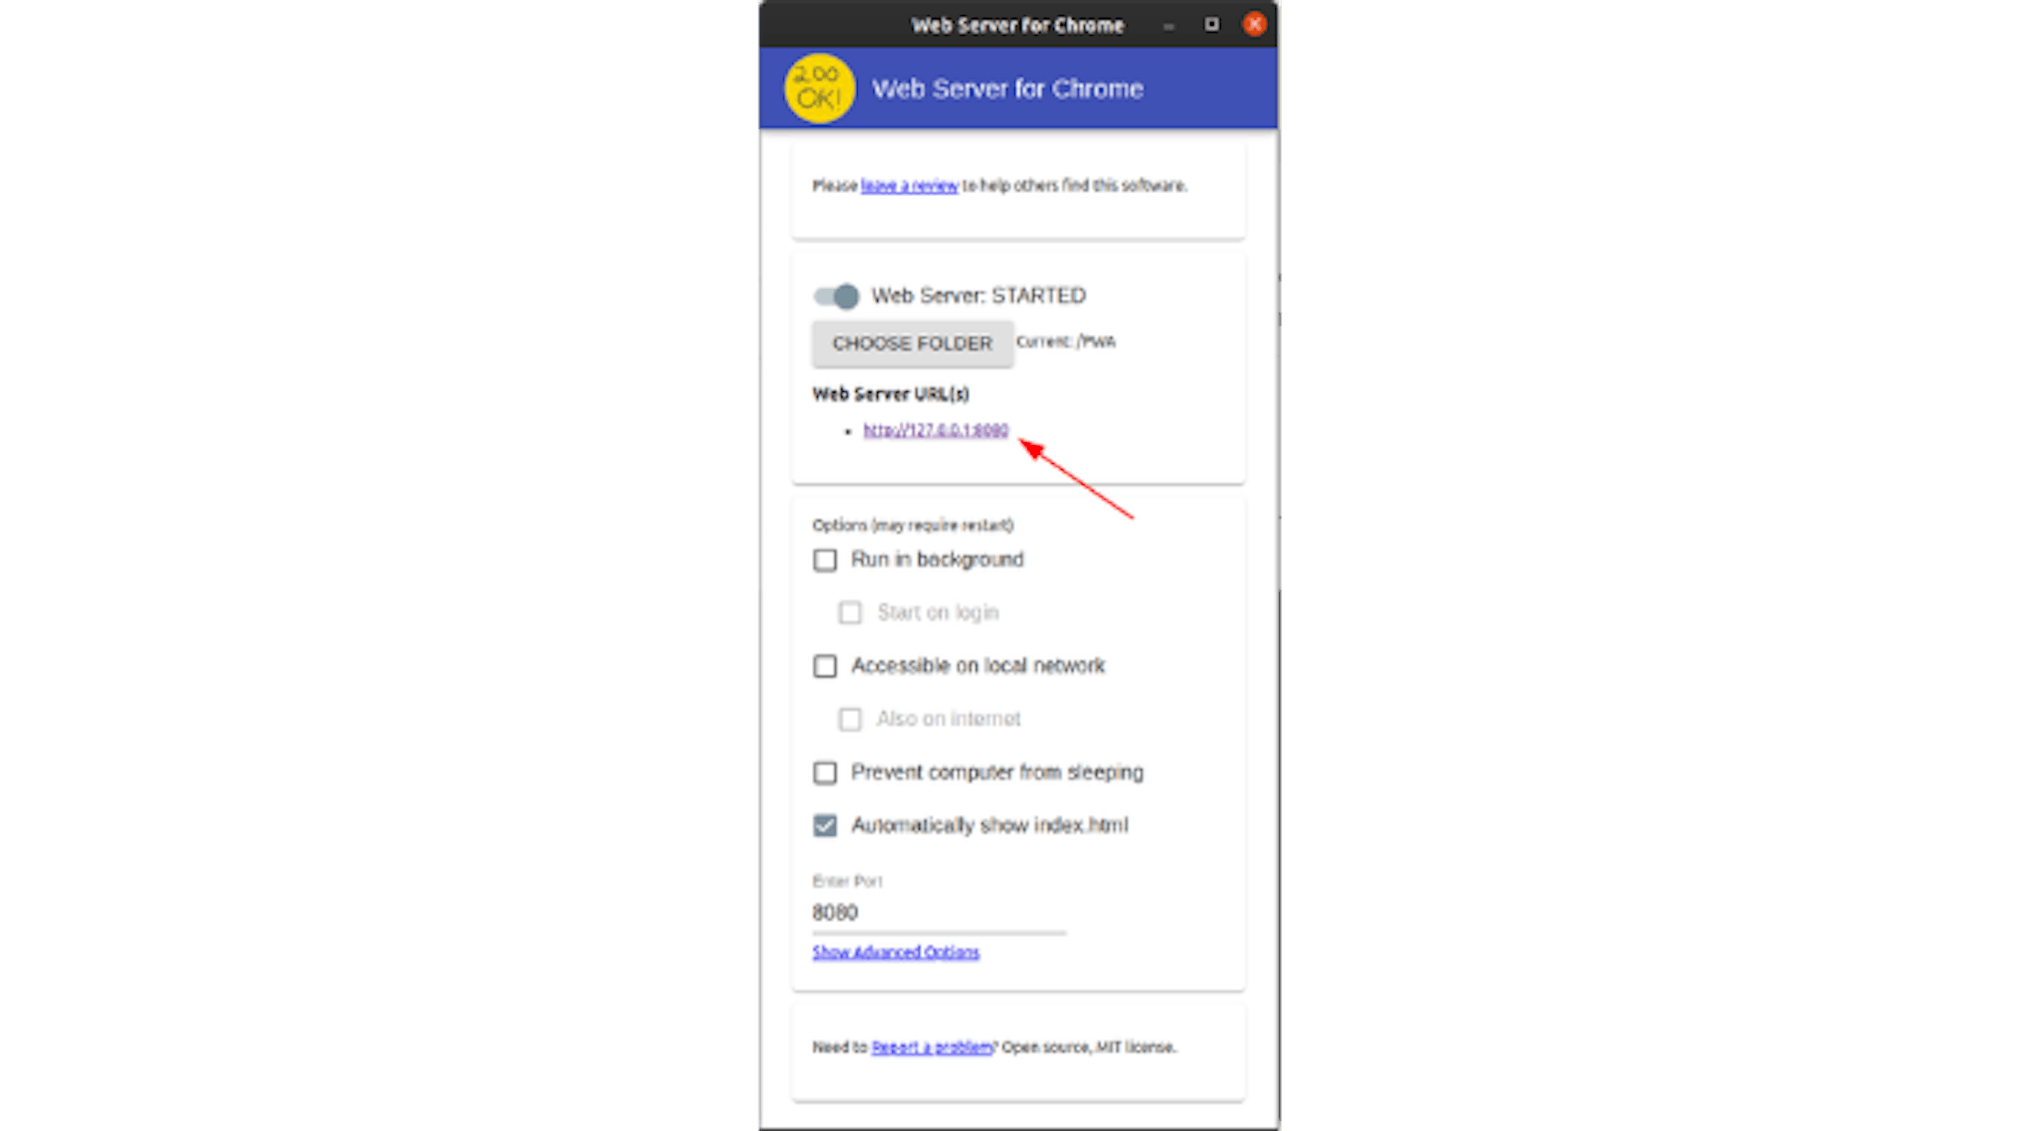
Now it remains to run and see what happened. I have found a very convenient extension, Web Server for Chrome, that runs a local server. You need to install it, and we will need it next. There is nothing difficult, just specify the folder with the project where it is index.html, he'll do it himself. Copy the link and paste it into the browser.
And here's what we got. I would not say that this is fine, but how normal for me!
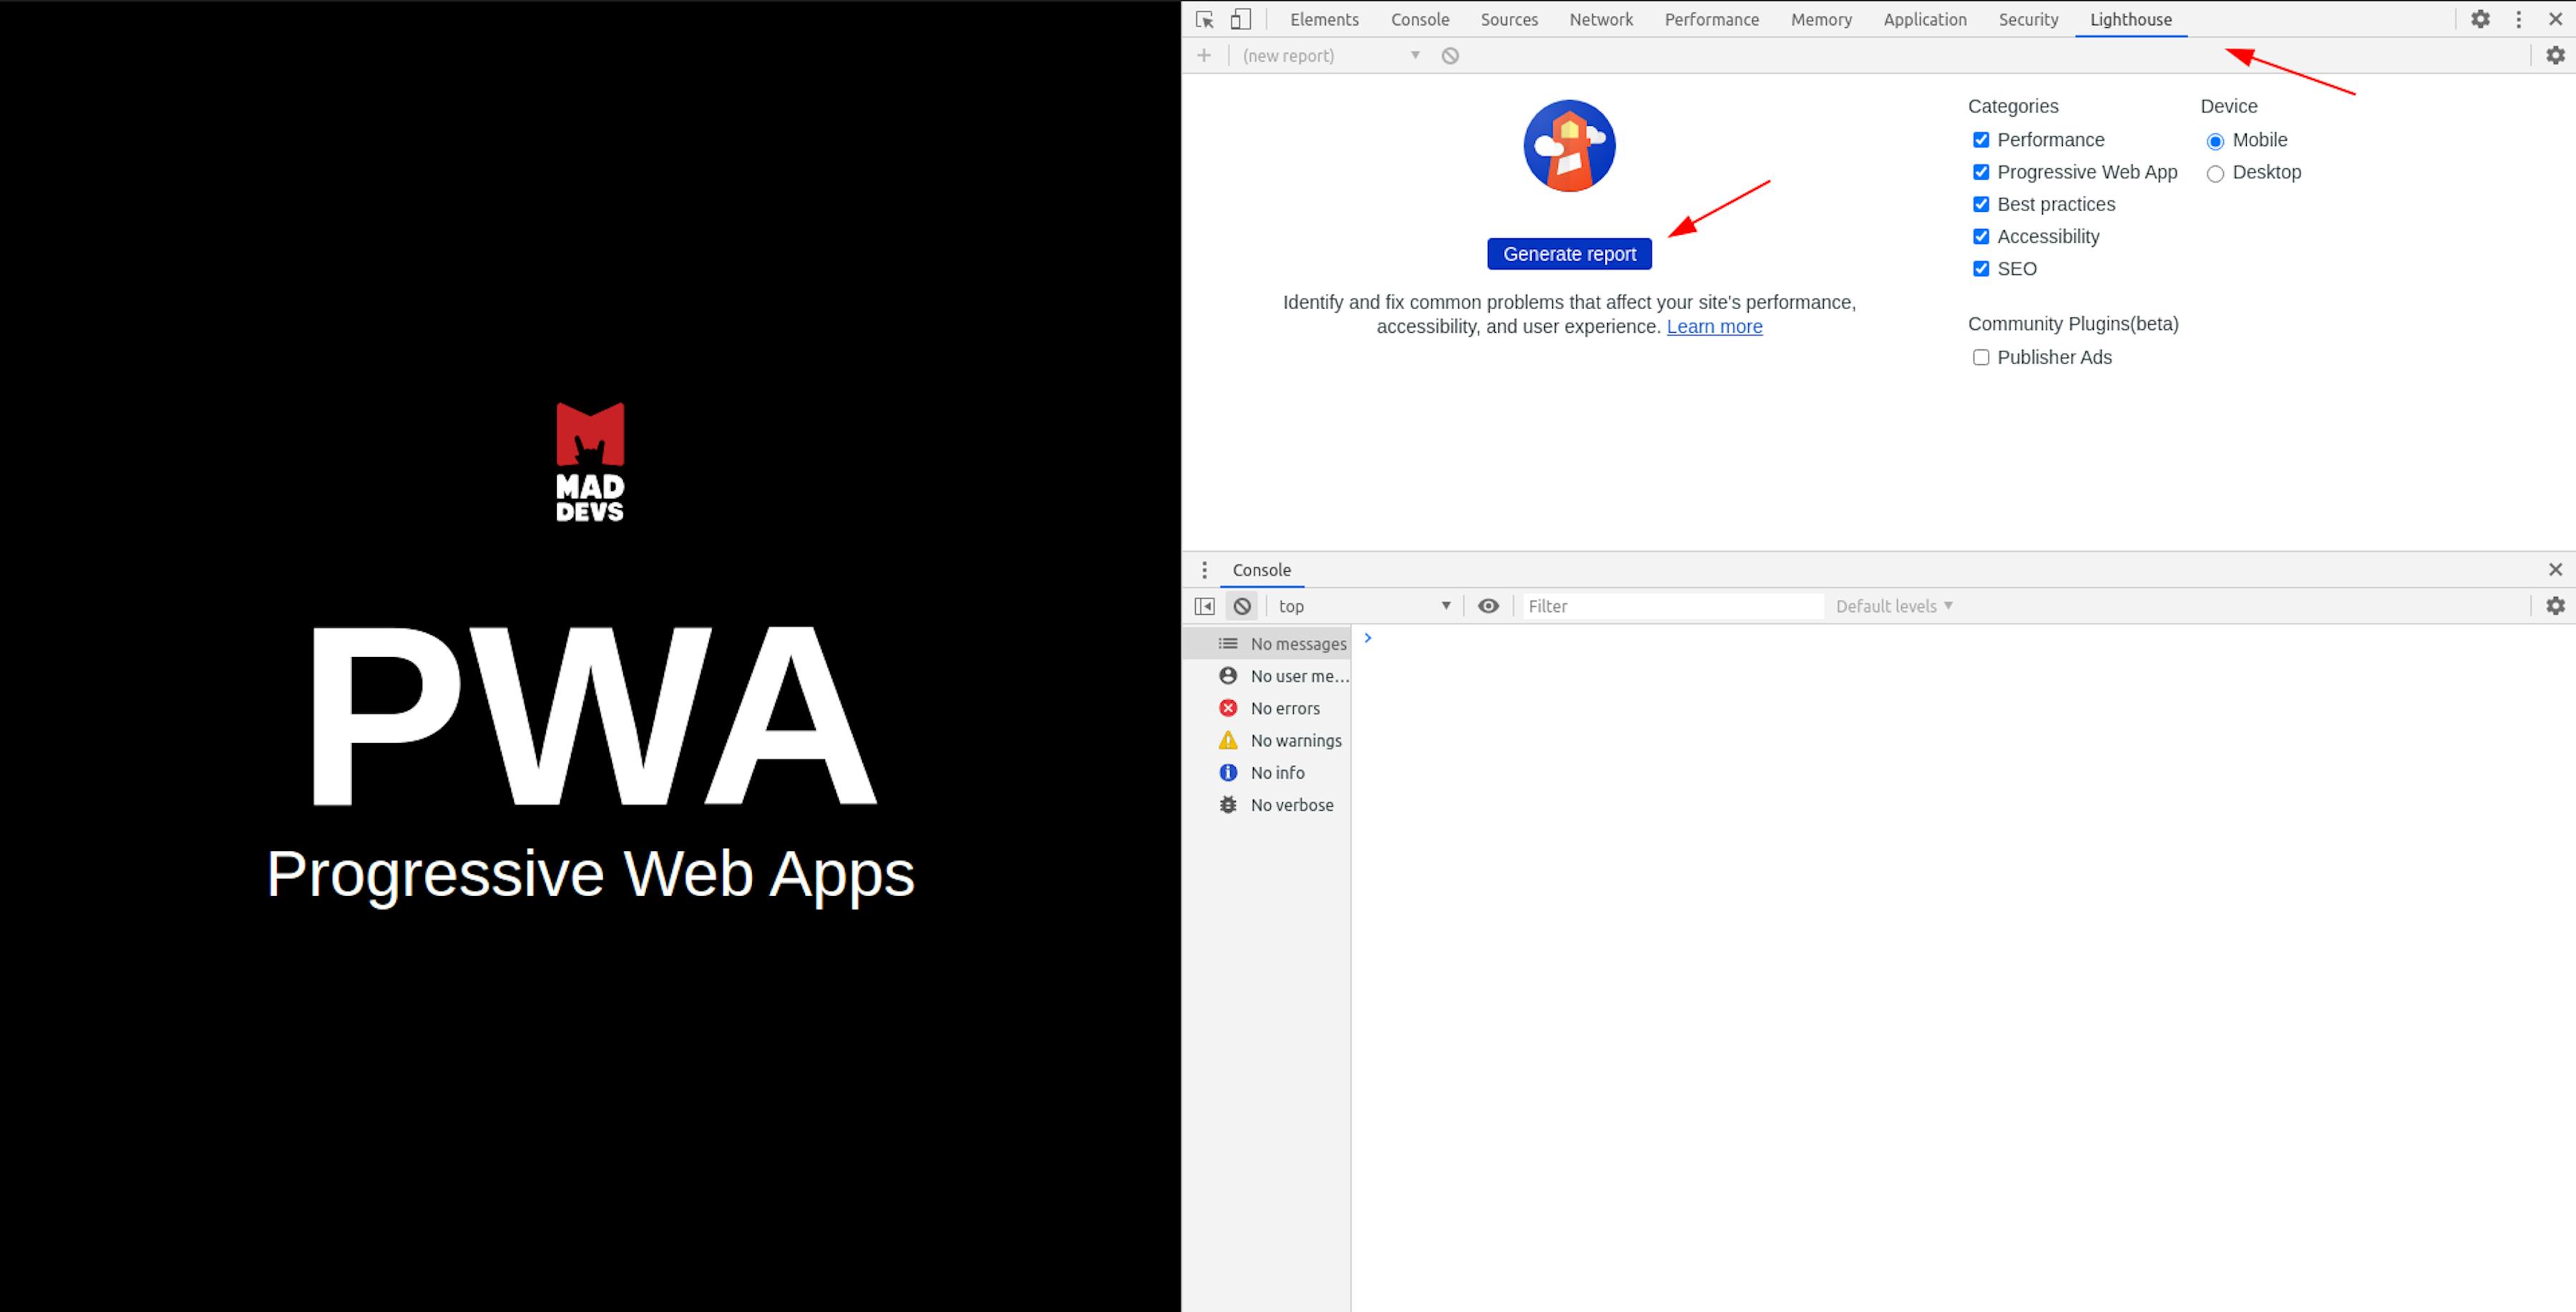
Well, listen, the most difficult thing, consider it done, let's now see what Google validation thinks about our work. To do this, press F12 and go to the Lighthouse tab (before Google updated, this tab named Audits), there will be a blue Generate report button, click.
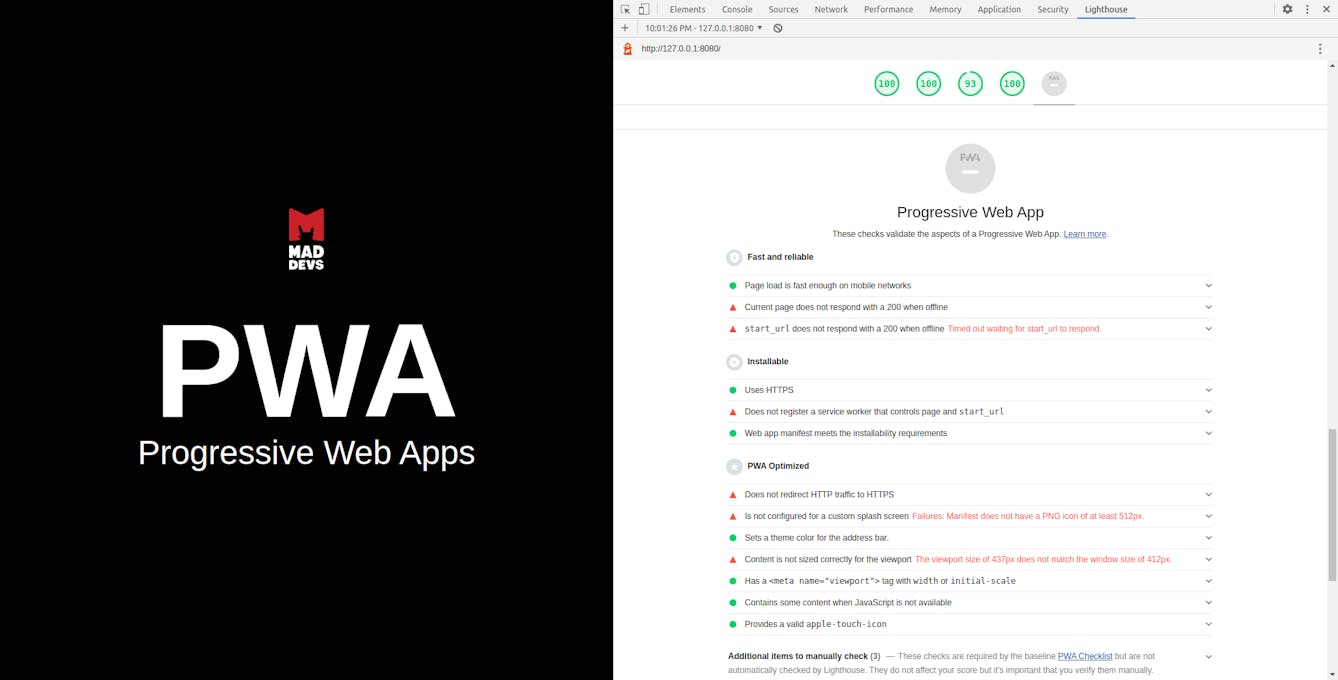
After the validation process is completed, we will see the following picture: the item responsible for PWA will be gray. This means that we do not have any settings.

And if you scroll down, you can see the recommendations that you need to follow for PWA to work like clockwork.
The Lighthouse tab will help you track all errors when configuring PWA.
Well, we finally got to the most interesting part
First, you need to create a manifest.json file in the root of the project. We add the following metadata to it:
- name — Full name. Used in the app shortcut.
- short_name — Abbreviated name will be used where the full name will not fit.
- icons — A list of icons that will be displayed in the shortcut of the installed app.
- lang — Default language.
- start_url — Required parameter. It tells the application which files to start from. When opening the app, the browser will always open this page.
- display — Indicates which format to open the browser window in.
- background_color — This property is used on the screen saver when the app is first launched on a mobile device.
- theme_color — Sets the color of the toolbar and can be displayed in the app preview in the task switches. theme_color must match the meta-theme color specified in the document header. In Our case,
This is enough for now. Here is a description of all the properties of this file, which will be the time, read necessarily.
Plug in manifest.json in index.html in the "head" tag
<link rel="manifest" href="/manifest.json">
Let's start writing scripts. Creating a folder named js, where we add the main.js file with this code:
window.addEventListener('load', () => {
  if ('serviceWorker' in navigator) {
    navigator.serviceWorker.register('/sw.js').then(reg => {
      console.log('SW registered!');
    }).catch(err => console.log('SW registration FAIL:', err));
  }
});
A few words about what is happening there:
- As soon as the page loads, we check whether the browser supports Service Worker, and if successful, we go further.
- Then register our file sw.js(which has yet to be configured). Nothing unusual about that.
Enabling scripts in index.html, but no longer in the "head" tag, but before the closing tag.
Well, now let's create the file itself, sw.js. It will store all the logic for the Service Worker. Create it in the root of the project, and add the cache name as the first line.
Next line, add the includeToCache variable. In it, we specify the files to be cached. Yes, I understand that it is not convenient, I have to register all the files with my hands, but we have what we have. But we will always be sure that nothing extra is cached. Traffic savings and stability.
Following we go to the event. Service Worker has several events under the hood, also called life cycles. And the first of them is install. It is triggered only once when writing the cache.
Fetch event. This event scans all requests, and if something matches what is in the cache, it returns a match from the cache. Otherwise, it returns what comes from the server.
The respondWith method is responsible for retrieving data from the cache or the data returned by the server. And if the server didn’t return anything, we take it from the cache.
This code is sufficient for now. Let's now make sure that the file sw.js is registered and the cache is recorded. Go to the developer console, open the Application tab, and then go to the Service Workers settings. Here we see that the file sw.js successfully registered, which is confirmed by a green light.
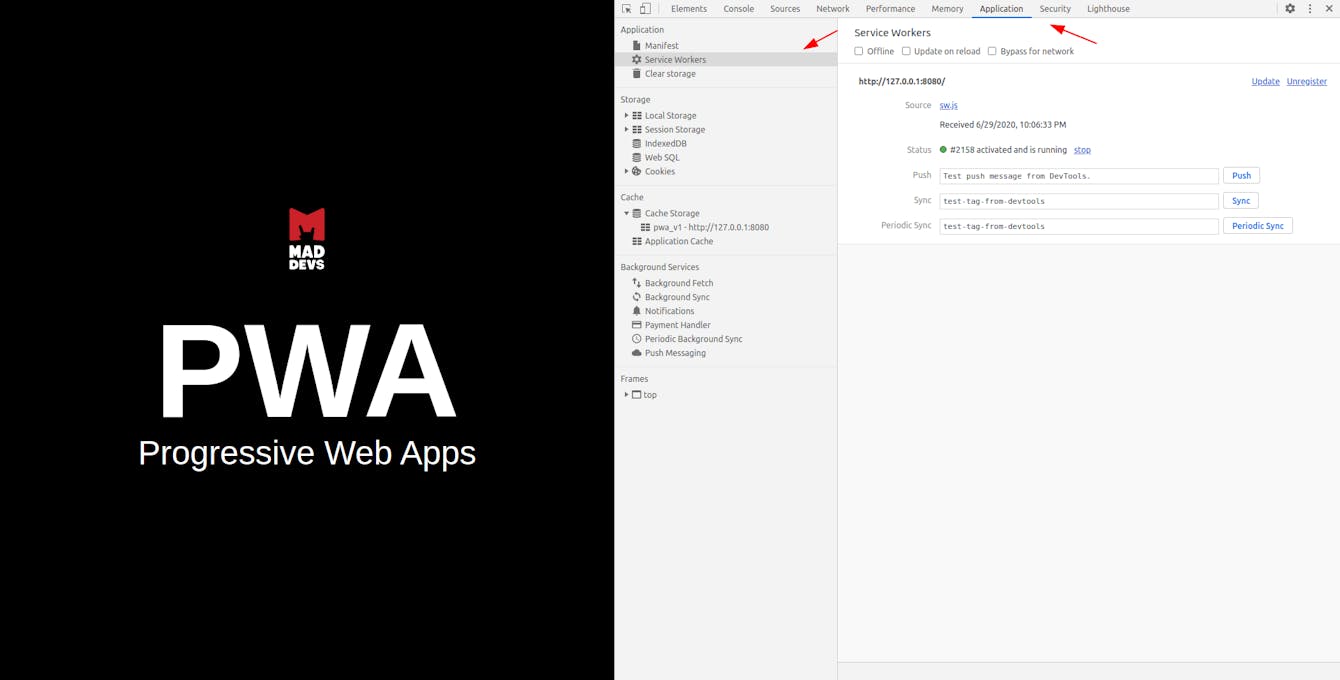
We continue to move along the side navigation panel, find a drop-down list with the name Cache Storage, where our cache is actually stored. If you click on it, you can see which files and content were cached.
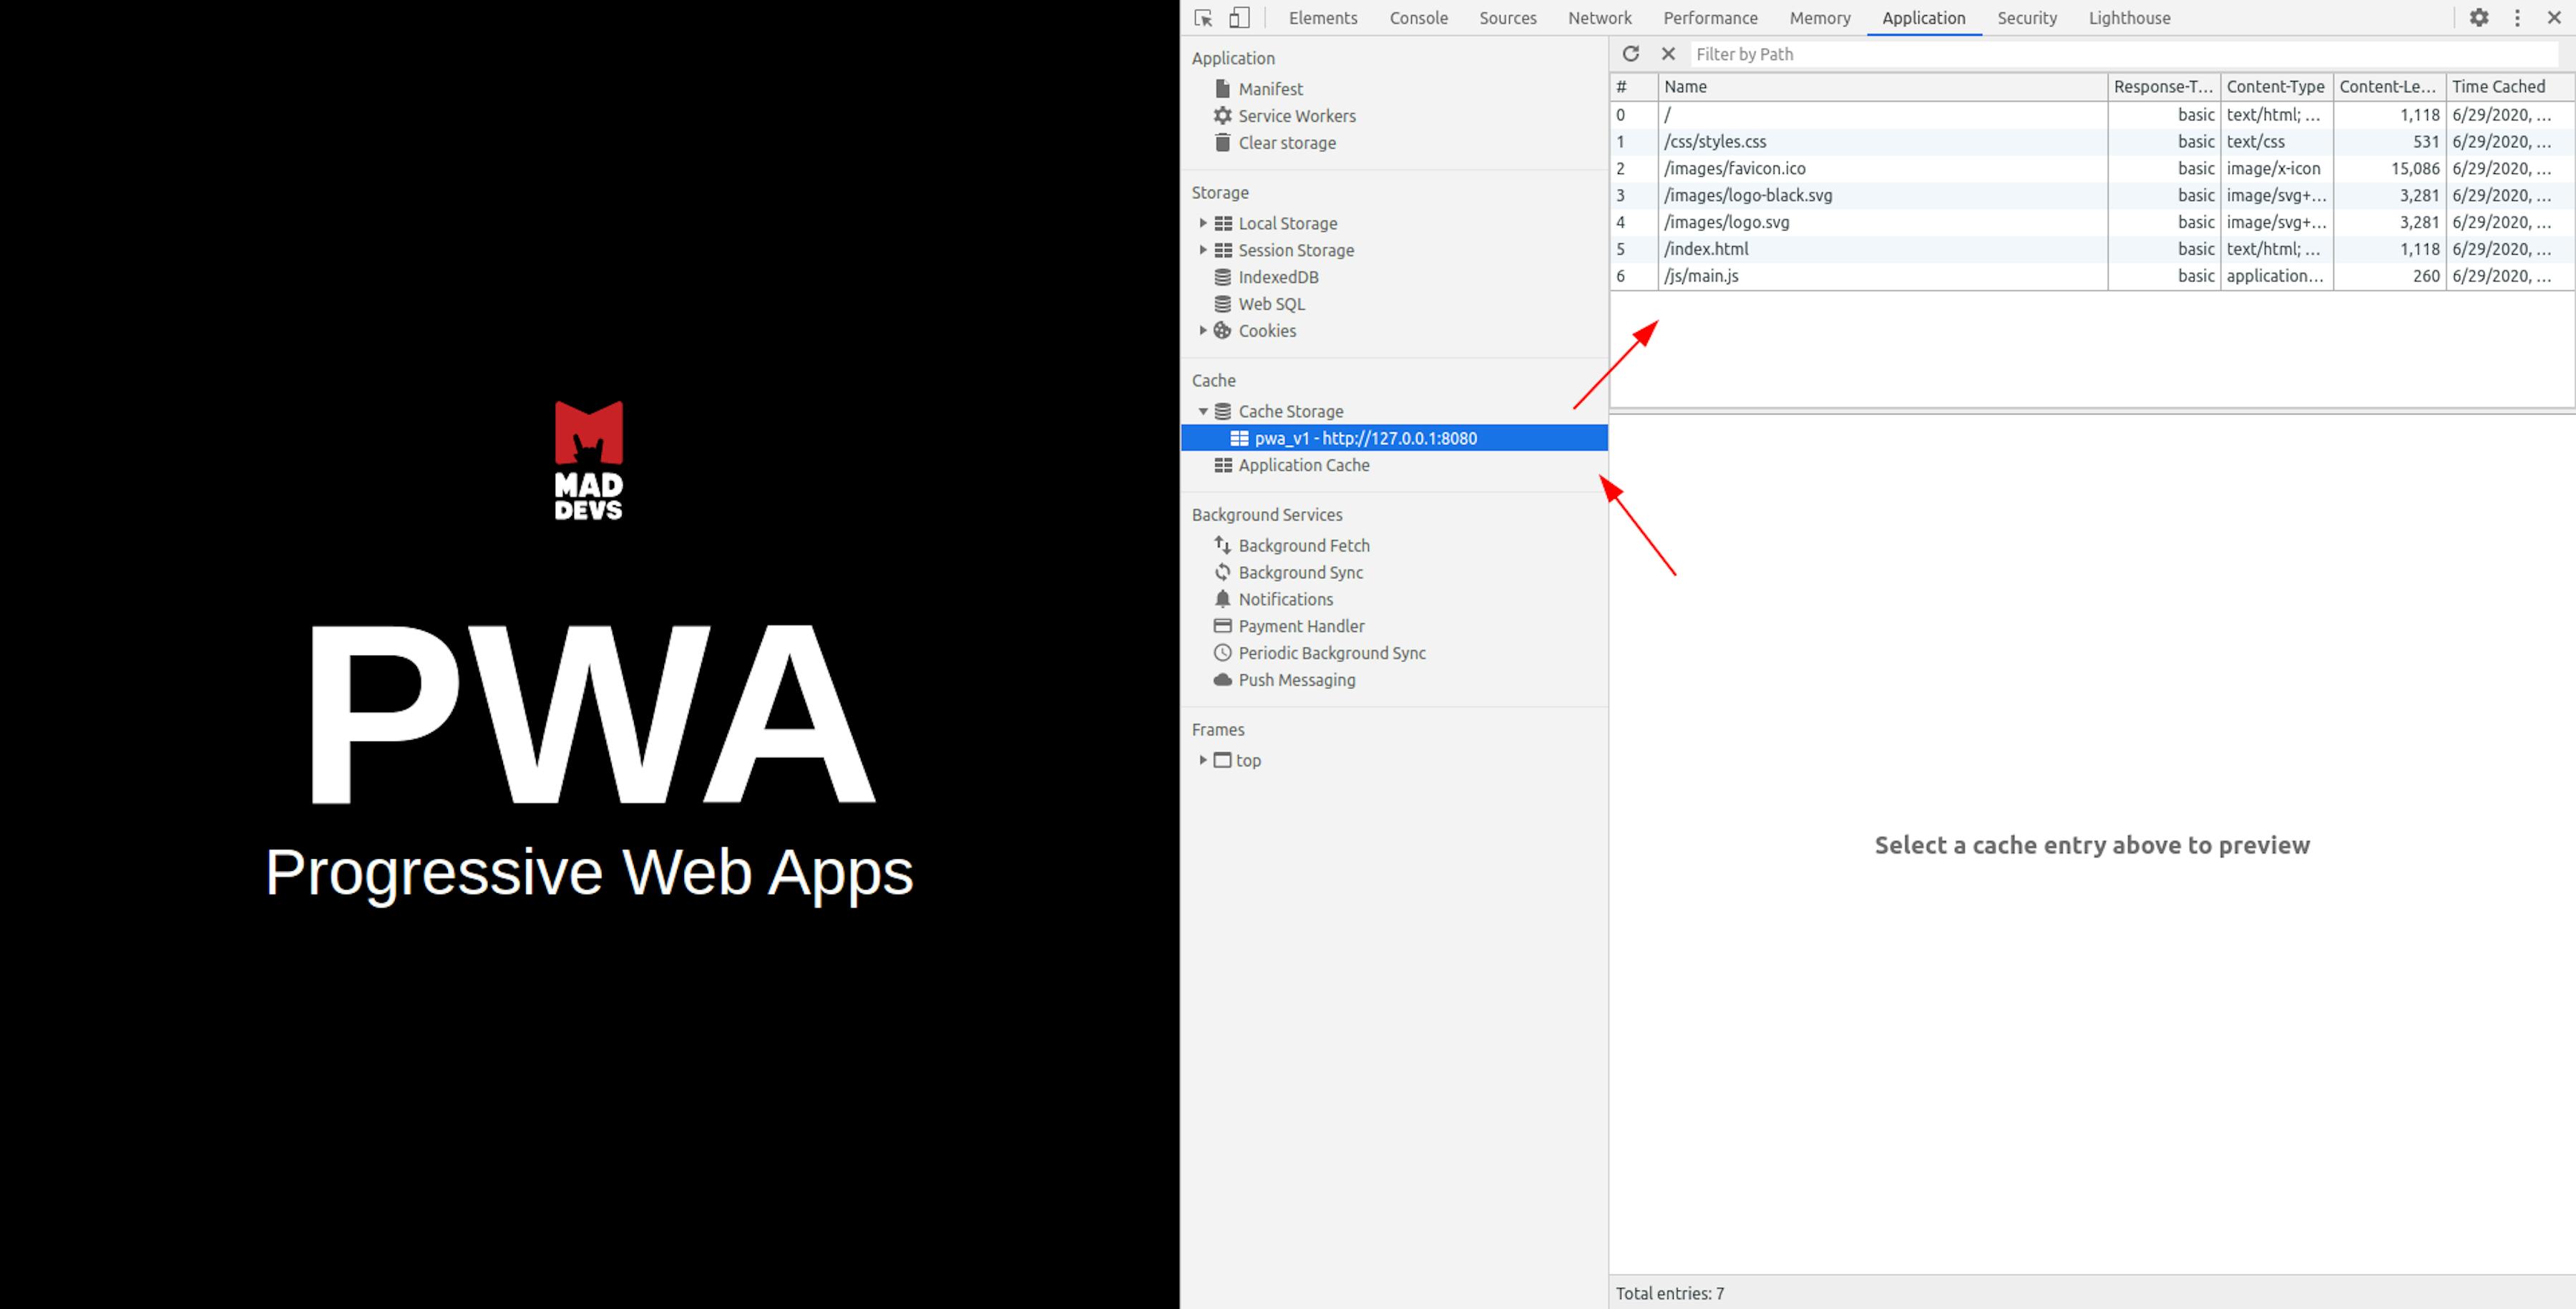
Now, if you disable the Internet and reload the page, the site will work.
Sum up. In order to make the site work when there is no Internet, you do not need to install any frameworks, add libraries, or so on. A few lines of code and a General understanding of this technology are enough.
How to update the cache?
The first problem I encountered while dealing with PWA was updating the old cache. But, as it turned out, this is very easy to solve.
Let's change a couple of styles so that you can see that something has changed. Then refresh the page and make sure that the styles have changed on the page. We cut off the Internet connection and reload the page again, but for some reason, the cache was not updated, and we see the old version of the site.
The solution is to add the activate event to the sw.js file. When called, we will check the names of the old and new cache, and if the names differ, then delete the old one and add a new one. Yes, in order for the cache to be updated, we need to change its name every time the code is updated.
In the beginning, I did not specify the postfix *_v1 in the cache name for nothing; this will be its version. It doesn't matter what you call it, as long as the names are different.
If you read the code, you can see a condition where the cache names are compared, and if they don’t match, the old cache is deleted.
A few words about the activate event. This event is triggered after the worker has been registered and is ready to work. But in order for it to be ready, you need to wait until the old cache is no longer used by the site, and this will take some time. And to get rid of this expectation, you can add the method below.
self.skipWaiting();
Now the cache will be updated immediately after registering a new worker. Adding it to the install event.
/* Start the service worker and cache all of the app's content */
self.addEventListener('install', e => {self.skipWaiting();e.waitUntil(
    caches.open(cacheName).then(cache => {
      return cache.addAll(includeToCache);
    })
  );
});
And in the main.js file, adding the update function, which will start updating the cache every time the page is reloaded.
reg.update();
Add the console.log() method. In fact, it does not matter; the main thing is that in the callback .then()
window.addEventListener('load', () => {
  if ('serviceWorker' in navigator) {
    navigator.serviceWorker.register('/sw.js').then(reg => {

      reg.update();

      console.log('SW registered!');
    }).catch(err => console.log('SW registration FAIL:', err));
  }
});
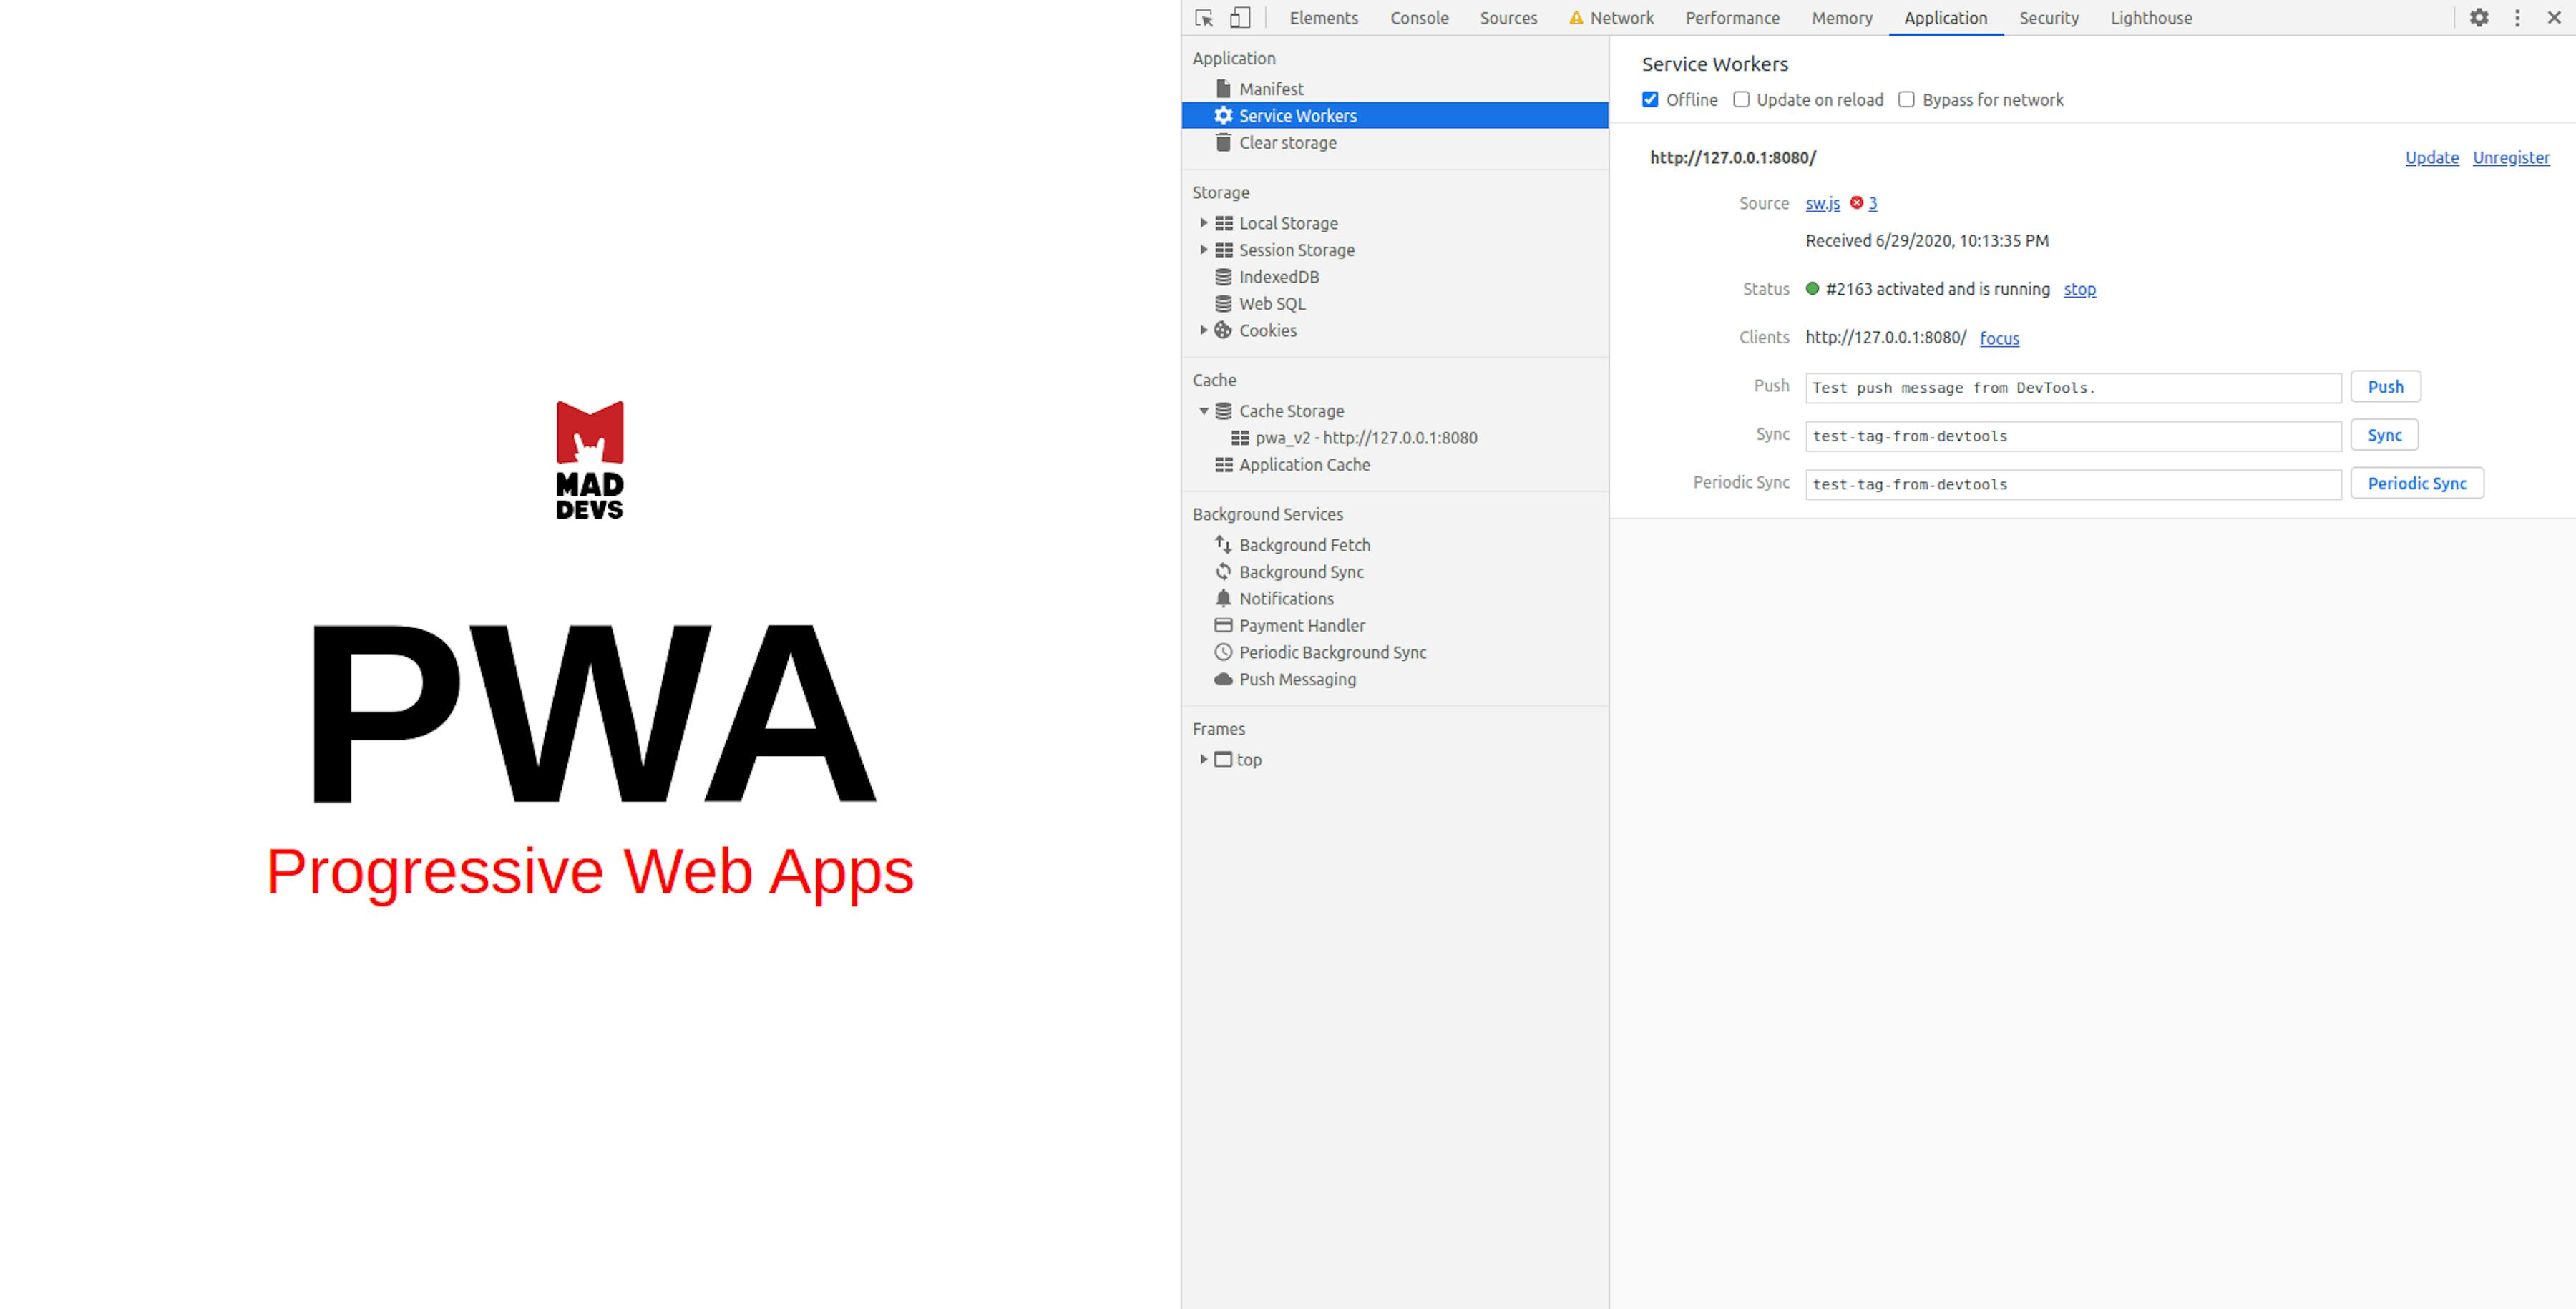
That’s it, reload the page. Open the developer tools again, check offline in the Service Workers tab on the side panel, reload the page again, and watch the Cache Storage tab. Here you can see how the old cache will be replaced by the new one.
Installing a new worker takes ~2 minutes, so you may need to reload the page several times.
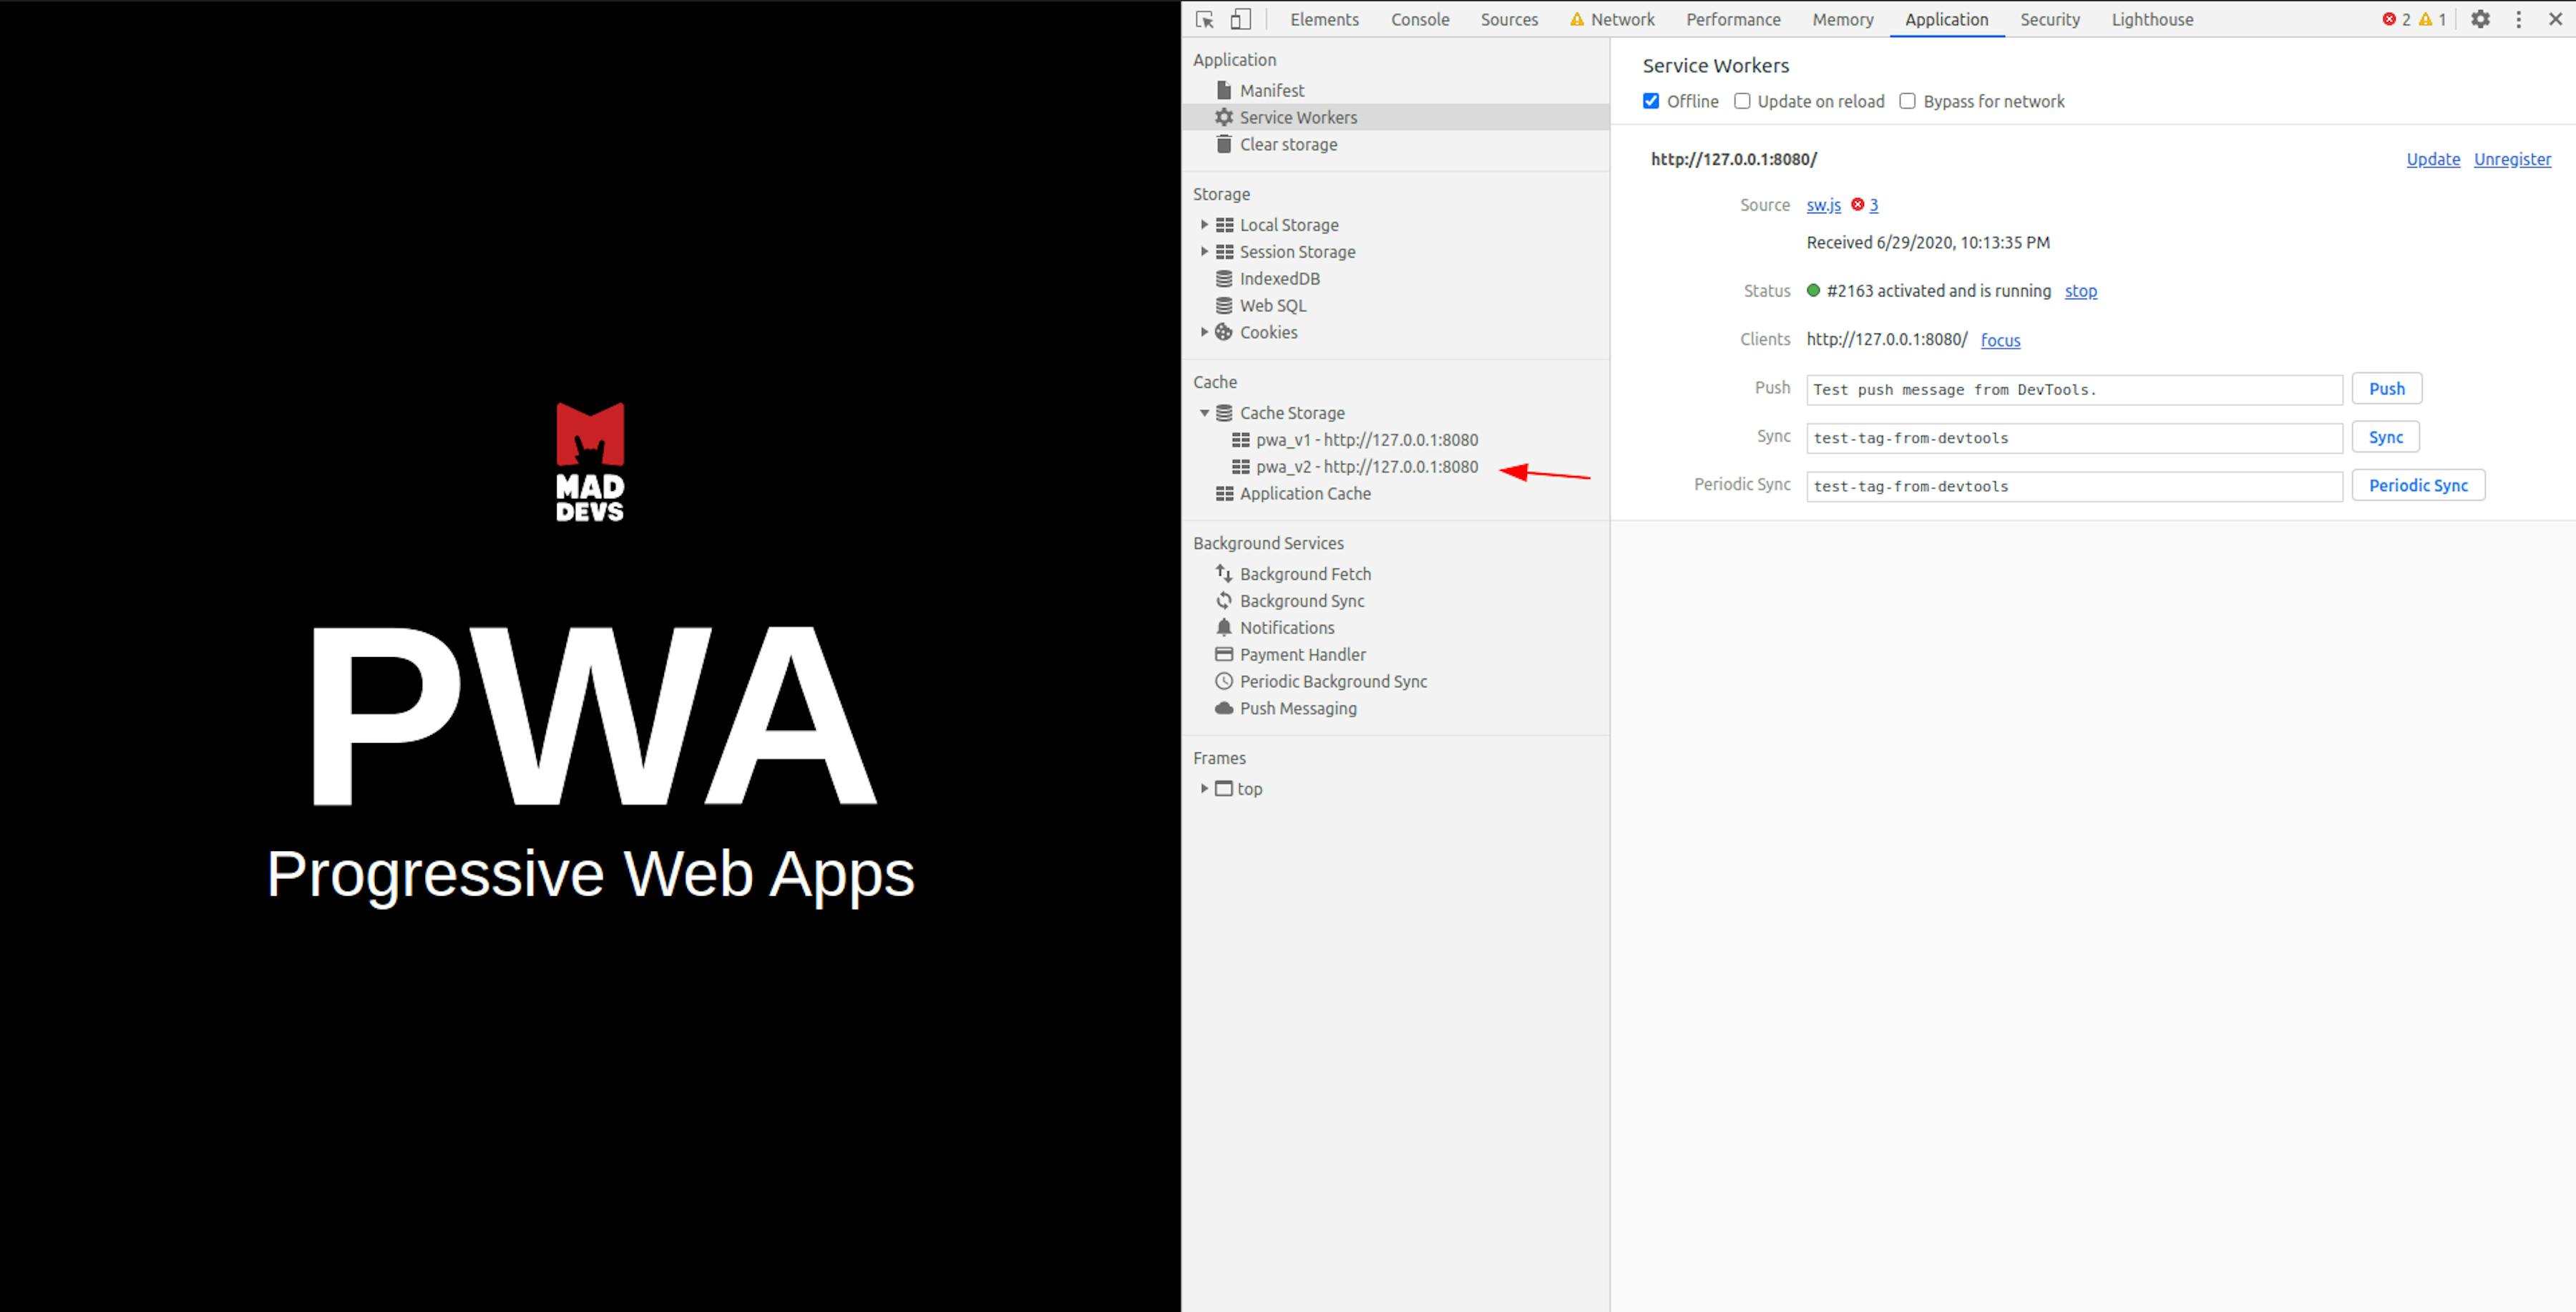
And after the page, we see our new styles and updated cache. Hooray!
Conclusion
In this article, we've learned basic information about how to create and set up PWA technology in a real example. Please feel free to comment on the article and share your experience about setting up the PWA.

